There are times when Pinnacle Studio has issues with the video files you try to edit in the program. In general, these files will come from an “unusual” source. There could be a number of symptoms – frozen or missing frames, no video only audio, no audio or distorted audio, files that seem to edit OK but then go out of sync when you export the final movie, just a red warning thumbnail, Studio crashing back to the default error message “NGStudio has stopped responding” or just plain poor quality. By “unusual” I mean some webcams, mobile phones that use variable frame rates (including some Apple phones), cheap copycat action cameras, drones and gimbals, some screen or analogue video capture programs and professional video cameras. Usual sources are mainstream consumer/prosumer video cameras with the filetypes MP4, MTS or M2TS, video ripped from unprotected DVD and Blu-ray discs and Studio’s own screen capture programs. If the filetype is something other than this, you should be suspious of the source material. For example, the filetypes MOV and in particular AVI can contain a wide range of audio and video codecs – just because one AVI file works doesn’t mean that any AVI file should work.
However, there are times during the development of a new verson of Studio where even the “usual” sources can play up. The more mainstream the source the more likely that this will be picked up at the beta testing stage, but that’s not always the case. For example, at the time of writing we are waiting for a patch to cure audio sync issues with MTS files in PS23.1
Of you have a file that isn’t working correctly in Pinnacle Studio then you can contact Pinnacle or post on the forum and ask for help, and there may be a patch on the way. However more often than not you will told to convert (or transcode) the file.
The first stage of this can be as simple as putting the file on an empty timeline and exporting it, using the Same as Timeline checkbox. This is always worth a try, because it’s so quick to do, but it’s only going to work in rare circumstances.
Handbrake
By performing the conversion outside of Studio you stand a much better chance of fixing the problem. The GoTo program for conversion is currently Handbrake. It has a number of great advantages:
- It is totally free, doesn’t nag you to upgrade to a paid version and doesn’t try to trick you into installing PUPS – Potentially Unwanted Programs.
- If you live in an NTSC country or use NTSC equipment you can use it “right out of the box”.
- It has a vast array of encoding options should you wish to dive in to the settings.
- It is fast.
In my opinion there are three disadvantages:
- It assumes that you want your video converted to 30fps HD regardless of the source frame rate or resolution.
- It won’t convert at a resolution higher than HD
- It doesn’t seem to have the option to use Direct Stream Copy
I could even be wrong about the last two points because I haven’t poked around enough in the settings. The first issue is just a matter of comparing the information about the source file and adjusting the frame rate in the Video tab. In fact, even for 30fps source video, I suugest you change Peak Framerate to Fixed Framerate.
I recommend Handbrake when you are experiencing video issues or audio sync issues you think are being caused by a variable video framerate
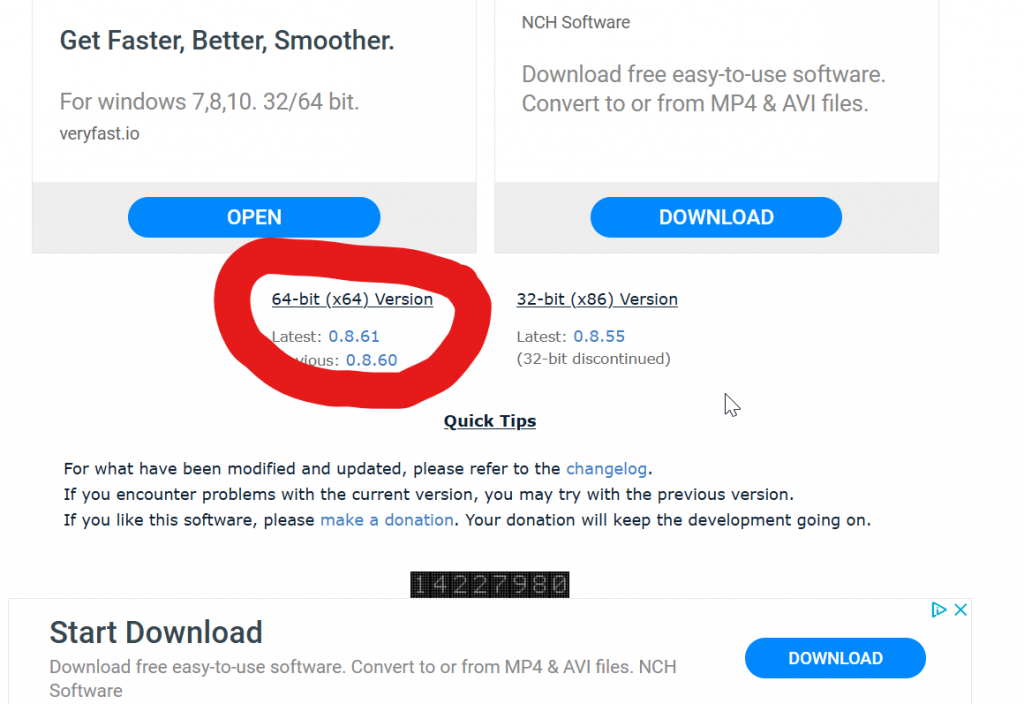
You can download Handbrake HERE.
MediaCoder
This program in it’s basic form is also free. It’s a bit harder to download, and will nag you to upgrade if you want to use some features such as Batch processing. However it does perform Direct Stream Copy, where the video isn’t re-encoded during the conversion process. This has two advantages – the video will not be degraded in any way, and the process is very fast. So if you have audio issues or sync issues not caused by variable framerate video, Mediacoder is a good choice.
To download MediaCoder go to http://www.mediacoderhq.com. Problem number 1 – The pages of the site are littered with adverts for “free” video convertors – none of them Mediacoder – and some of them are placed (deliberately?) close to the real links. Ignore anything that looks like an advert and use the menu bar to go to the Downloads Page.
Now pick your your way carefully past the ads to a link that looks like th screenshot I’ve provided and click to go to another page where again you will have to pick your way carefully to find the link to choose the download site from where you want to get the program. If one of those doesn’t respond or seems to slow, try the other.
Finally, you should have a download dialogue box open in your browser. Save the file somewhere you can find it – it’s about 80Mb in size. Once downloaded you can now close your browser to escape from tempting adverts 🙂
Loacate the MediaCoder download and install it with care, otherwise it might muck around with your Internet browser. The current version doesn’t, but don’t just click through all the defaults – check them. When you finish the installation, your Internet browser will take you to a page asking for a donation. Don’t panic, it won’t keep doing this, but if you do use the program regularly you might want to donate or upgrade to a version that lets you batch convert easily.
The Copy Video feature
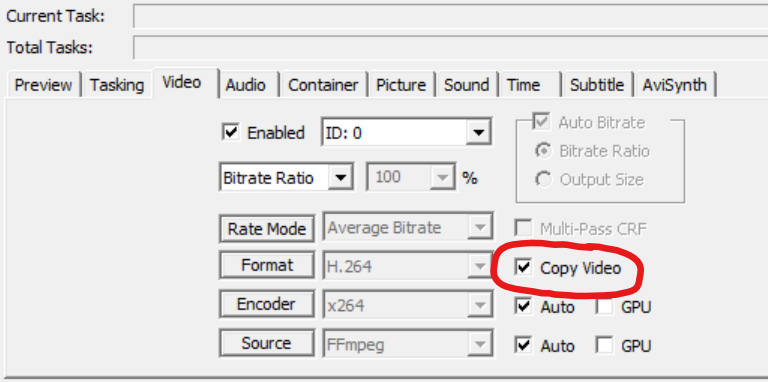
MediaCoder attarcts me because to the Direct Stream Copy feature, but it’s not immediately obvious where to find it. The screenshot shows you where to find the checkbox you need in the left hand set of tabs undr Video.
If you check out the Sound tab you will find a useful setting for Channel Mapping, handy if you are dealing with video with multiple audio channels.
The following sections are case studies from the days of Avid Studio 1.1. I’ve included them for reference.
Case Study One – Transcoding an out of sync M2T file
has issues with HDV video captured to a CF card. A hotfix was issued which solves most of the problems, but there are reported instances where although the file appears in the program, its audio is out of sync by about 5 frames. The file works correctly in other players and editors, including Pinnacle Studio.
Firstly, we need to get the file into MediaCoder. To add the file you can use the +Add File button and browse to it, or simply drag the file from an Explorer window into the Queue – that’s the area immediately below the buttons, to the left of the program window. It’s called a Queue because you can carry out batch file operations on a series of file here – great if you have 20 files that are all going to need the same treatment.
Further down, below the task bars is a tabbed window where we are going to make most of our changes. Before we do, let’s reset the program, because if I don’t mention a setting, I assume it is using the default. Use the drop-down File menu and choose Revert All Settings.
Now click the Video tab and look for the Copy Video checkbox. With this checked, the video will not be re-encoded. Notice that all the video choices – Rate Mode, Format and so on – are greyed out. We aren’t going to touch the video!
In order to reposition the audio, we are going to re-code it. Switch to the Audio tab alongside the Video tab we have just been using. Open the format tab and you will see a staggering array of choices. It’s best to use the same format as the original file in many cases, and we can find that out in the Properties box top right of the program. Scrolling down the box, you will see the audio is MPEG, with a bitrate of 384kbps, a sample rate of 48Khz and a delay of -216 milliseconds. That last figure will be of use to us later on.
I’ve chosen MP2 as the audio format as that is the short code for the audio codec in use. (If you are in doubt, a quick internet search will normally provide a clue).
As we are re-coding the audio, we are going to have to specify some parameters, Because the resample box has Original selected, we don’t need to worry about the sample rate. However, if you look to the box on the right, you will see tha default bitrate is set to 128kbps. I’m going to just type the original bitrate into the value box there – 384. Perhaps I don’t need to, but it will make so little difference to the file size that I may as well.
The next tab is going to need our attention as well – the Container tab. If you aren’t sure what a container is, then you aren’t alone. When people say that a video file is a quicktime file with the file extension .MOV, they are not really specifying anything other that the video file is in a .MOV container. The video and audio inside the container could be one of many formats. Some containers, are very sophisticated and sometimes called wrappers.
I’m going to chose a very simple container for our conversion – MPEG2. As both streams use Mpeg-2 compression/decompression formats (codecs) and I know that Avid Studio is very happy with the format it seems the best choice. Notice again that I’m leaving everything else at it’s default settings.
I could be a bit of a tease here and suggest you do the conversion and study the results, but I may as well tell you that the audio is still going to be out of sync. Remember the figure for audio delay we saw in the properties box? My guess is that this information is available in the header of mpeg files and playback programs, including Avid Studio should take it into account. However, if we don’t shift the audio back in out straightforward .mpg transcoded file, Windows Media Player replays it out of sync!. No, I don’t understand the logic either, but neither, it seems, does Avid Studio.
If you switch to the Sound tab you will see that MediaCoder gives you the chance to alter the audio delay. I must admit the next step was just trial and error for me. After a false start by putting in -216 and making matters worse I entered the complimentary number, +216, into the audio delay box and produced a file that played correctly in Windows.
All that remains now is to perform the task. The new file will automatically be given the correct file extension for the chosen container. Unless you change the default setting in the Output folder top right of the program screen the new file will be placed in the same location as the original file. When you click on the Start button alongside the Output Folder control window, all the tasks in the Queue that have a check mark alongside them will be processed – unless the word Done appears in the State column, in which case you need to reset the state of the item – right clicking to bring up the context menu will give you an option to do this.
Make your file and test it in WMP and Avid Studio. It should be in sync, and the video quality should be identical to the original. Now you can edit with it and not have to adjust the sync within the editor.
Case Study Two – ADPCM Audio
Avid Studio, and Pinnacle Studio only handles a subset of MOV formats. In particular, a large number of devices encode the audio as ADPCM – a more advanced form of the simple audio compression format PCM – Pulse Code Modulation. You have most likely come across PCM when dealing with WAV files.
It’s quite irritating that AvSo can’t handle ADPCM audio when wrapped in a MOV container. I first came across this when I was being sent MOV files exported from Avid Media Composer. They wouldn’t even play in Windows Media Player, so I had to use Quicktime.
After a while, I got fed up with this, and turned to MediaCoder to see if it could re-code the audio without degrading the video, and after a little trial and error, I succeeded. Firstly, if you have jumped straight to this page, review the first page of this article regarding how to get MediaCoder running, then check out the first part of Case Study 1 to show you how to get the file into the MediaCoder Queue and also how to change the settings to the default.
Now you only need to change the settings that I tell you to. First off, switch to the Video Tab. Here we want to set the Copy Video checkbox.
This will ensure that the video isn’t re-coded, just copied straight into the new file. The next box we need to change is for Audio. Switch tabs and look in in the Format drop down box. Virtually at the bottom you will find PCM, so select that. The final tab we need to change is Container. Two settings need to be altered – you need to change Container to MOV and also disable the multiplexer by using the radio button as shown in the screen shots.
All that remains now is for you to process the file by clicking the Start button. Don’t forget to explore MediaCoder’s batch features. Once you have tested one file, you can convert as many files at a time as you like. I’ve converted some pretty long files using this method, and they have retained audio sync. Please let me know if your files don’t!
Case Study Three – Dolby Stream Errors
Pinnacle Studio 16 build 75 uses a different version of the Dolby encoder/decoder. Some cameras shooting MTS files seem to be more prone to creating corrupt fiiles. When this happens, PS16 mutes the audio. The result is that you end up with popping noises on the audio track. Avid Studio repeated the previous audio data, so the problem was less obvious.
Using Mediacoder, I’ve trancoded files and fixed the issue with no change of video quality and no discernable change in audio quality.
- Settings – reset everything to the default settings then alter the following:
- Video – check the Copy Video checkbox
- Audo – select AC3 as the Format and set the Bitrate to the same as the original file, probably 256 kbs
- Container – select MPEG TS
- Transcode the file(s) and on completion, rename the extension from .TS to .MTS.
Case Study Four – editing MFX files
MFX is a professional format, but often it contains high-bitrate MPEG-2 video which Studio can edit. The issue is getting the files out of the MFX wrapper.
Warning – I’ve not tried this myself yet, but one of the participants on the Pinnacle forum has and reports success. It’s going to depend on what is inside the MFX files as much as anything else
With the MFX file loaded into MediaCoder, check out the video codec. Hopefully, it will be Mpeg-2.
- Reset MediaCoder to it’s default settings, then select :
- Video – check the Copy Video checkbox
- Audio – copy the same audio characteristics as the original file
- Container – select mpeg-2
On transcoding,, Dazza Gee reported the files worked well within Studio 15.
You may be able to just copy the audio as well, but when I have tried to copy both streams in the past, I’ve encountered errors.
Thanks to Dazza Gee fro the feedback!